Coexisting with Rattlesnakes

Summer is prime time for hiking and exploring our gorgeous trails. As we do, it’s important to remember that we share these natural spaces with local wildlife—including the Northern Pacific rattlesnake.  Rattlesnake sightings are a natural part of our ecosystem, particularly at home in warm, dry parks with grasslands, woodlands, and rocky terrain.

While these snakes have a formidable bite, encounters are rarely dangerous. Rattlesnake bites are uncommon, and fatalities even more so. By understanding snake behavior and following a few basic safety rules, you can confidently and safely share the trail.

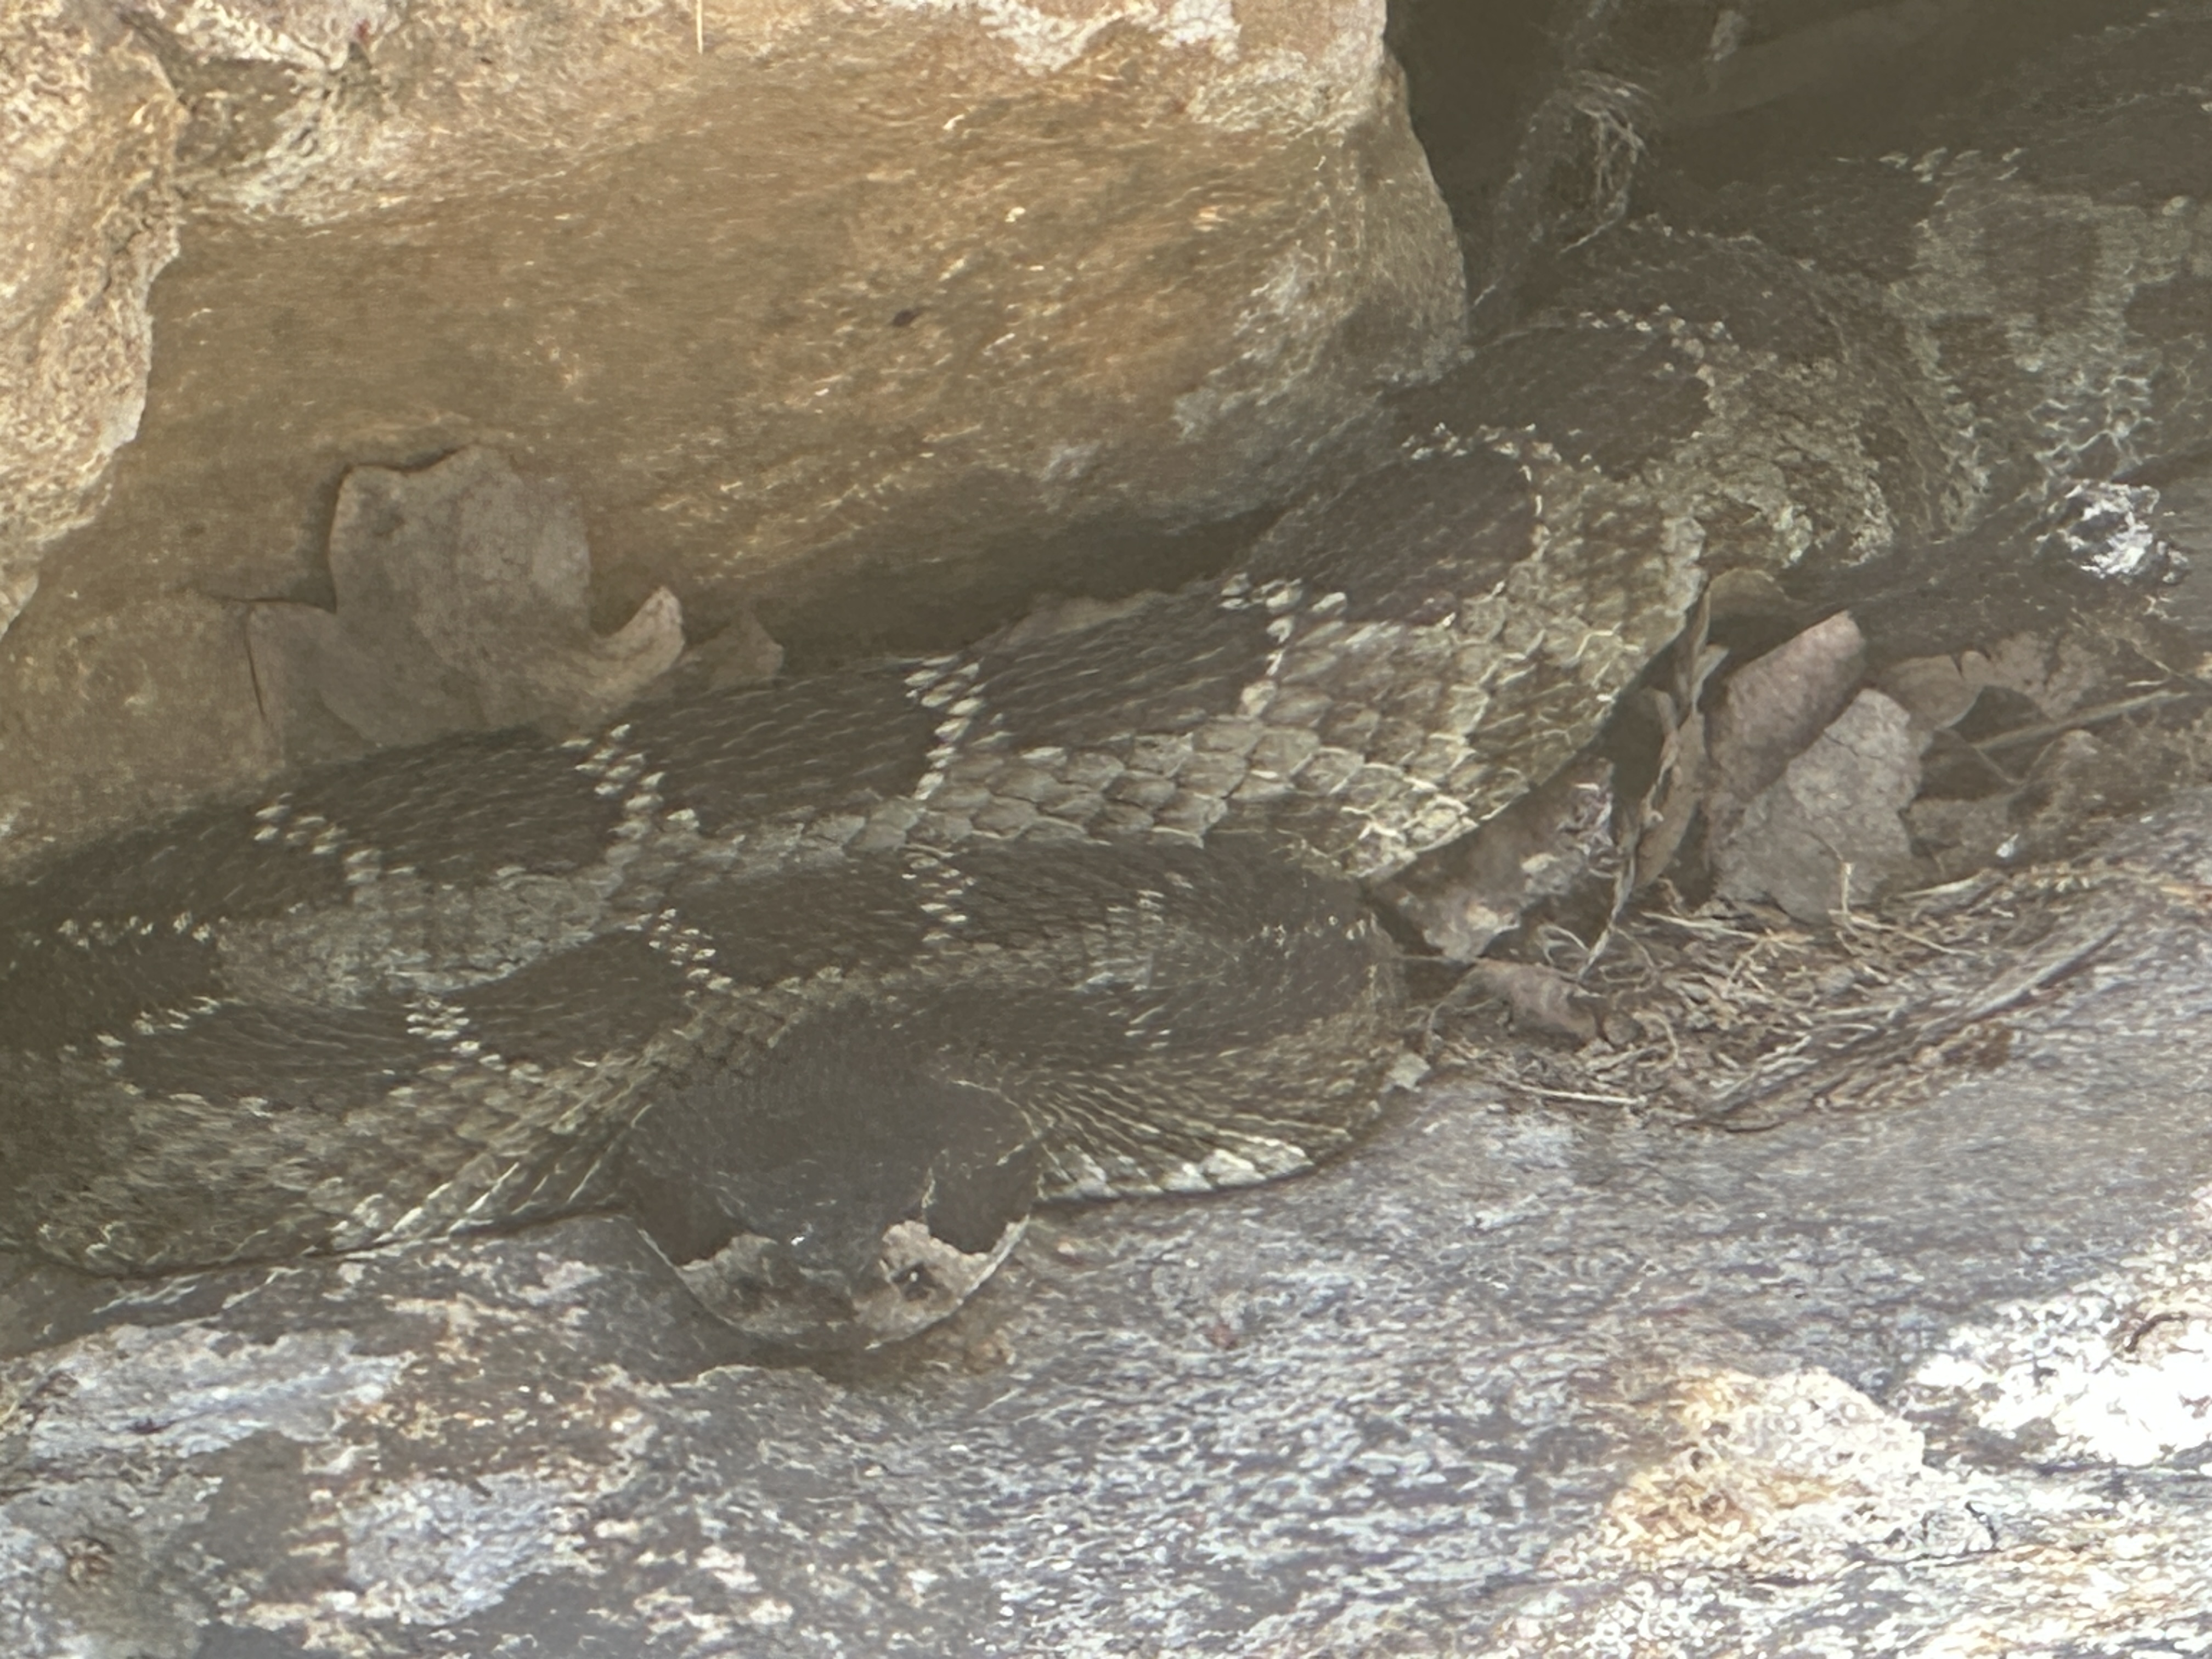
Spotting a Rattlesnake: What to Look For
With many snake species in our area, telling them apart can be tricky. Rattlesnakes have a few defining features:

  • A distinct, triangular-shaped head with a tapered neck.
  • A thick body with large scales.
  • A rattle at the end of the tail (although they sometimes lose their rattles).

No matter what kind of snake it is, give it a wide berth.

Rattlesnake Behavior

Midday Snooze

Rattlesnakes are ectothermic (cold-blooded), meaning they rely on their environment to regulate their body temperature.

  • In the morning: You might spot them stretched out on a sunny trail or rock to warm up after a cool night.
  • Midday: They seek shelter to stay cool. Avoid reaching under logs, rocks, woodpiles, or heavy brush.
  • Peak hours: While they can appear anytime, they are most active during the morning, dusk, and nighttime hours when they hunt for food.

What If You Come Upon a Snake?

Rattlesnakes are not aggressive; they are shy creatures and prefer to avoid humans. They will may try to escape if they sense you, however, many snakes freeze and rely on their camoflage to protect themselves, so don’t assume that they will head off if they sense you coming.  If you see one on the trail, follow these steps:

  • Back away calmly. Give the snake plenty of opportunity and space to back off.
  • Do not agitate the snake. Never wave objects or poke at the snake with a stick—this is how many people accidentally get bitten.
  • Stomp your feet. Rattlesnakes don’t have external ears to hear shouting, but they are highly sensitive to ground vibrations. Stomping your feet from a safe distance signals your presence and may prompt them to move along.
  • A rattlesnake can strike across a distance of two-thirds of its body length. Try to maintain a distance of at least 10 steps away.

What if it won’t move?

If a snake refuses to move off, be patient and wait, or turn around. Do not attempt to step over or around it unless you can maintain a wide, safe distance. Keep your eyes on the snake; they can move surprisingly fast when motivated.
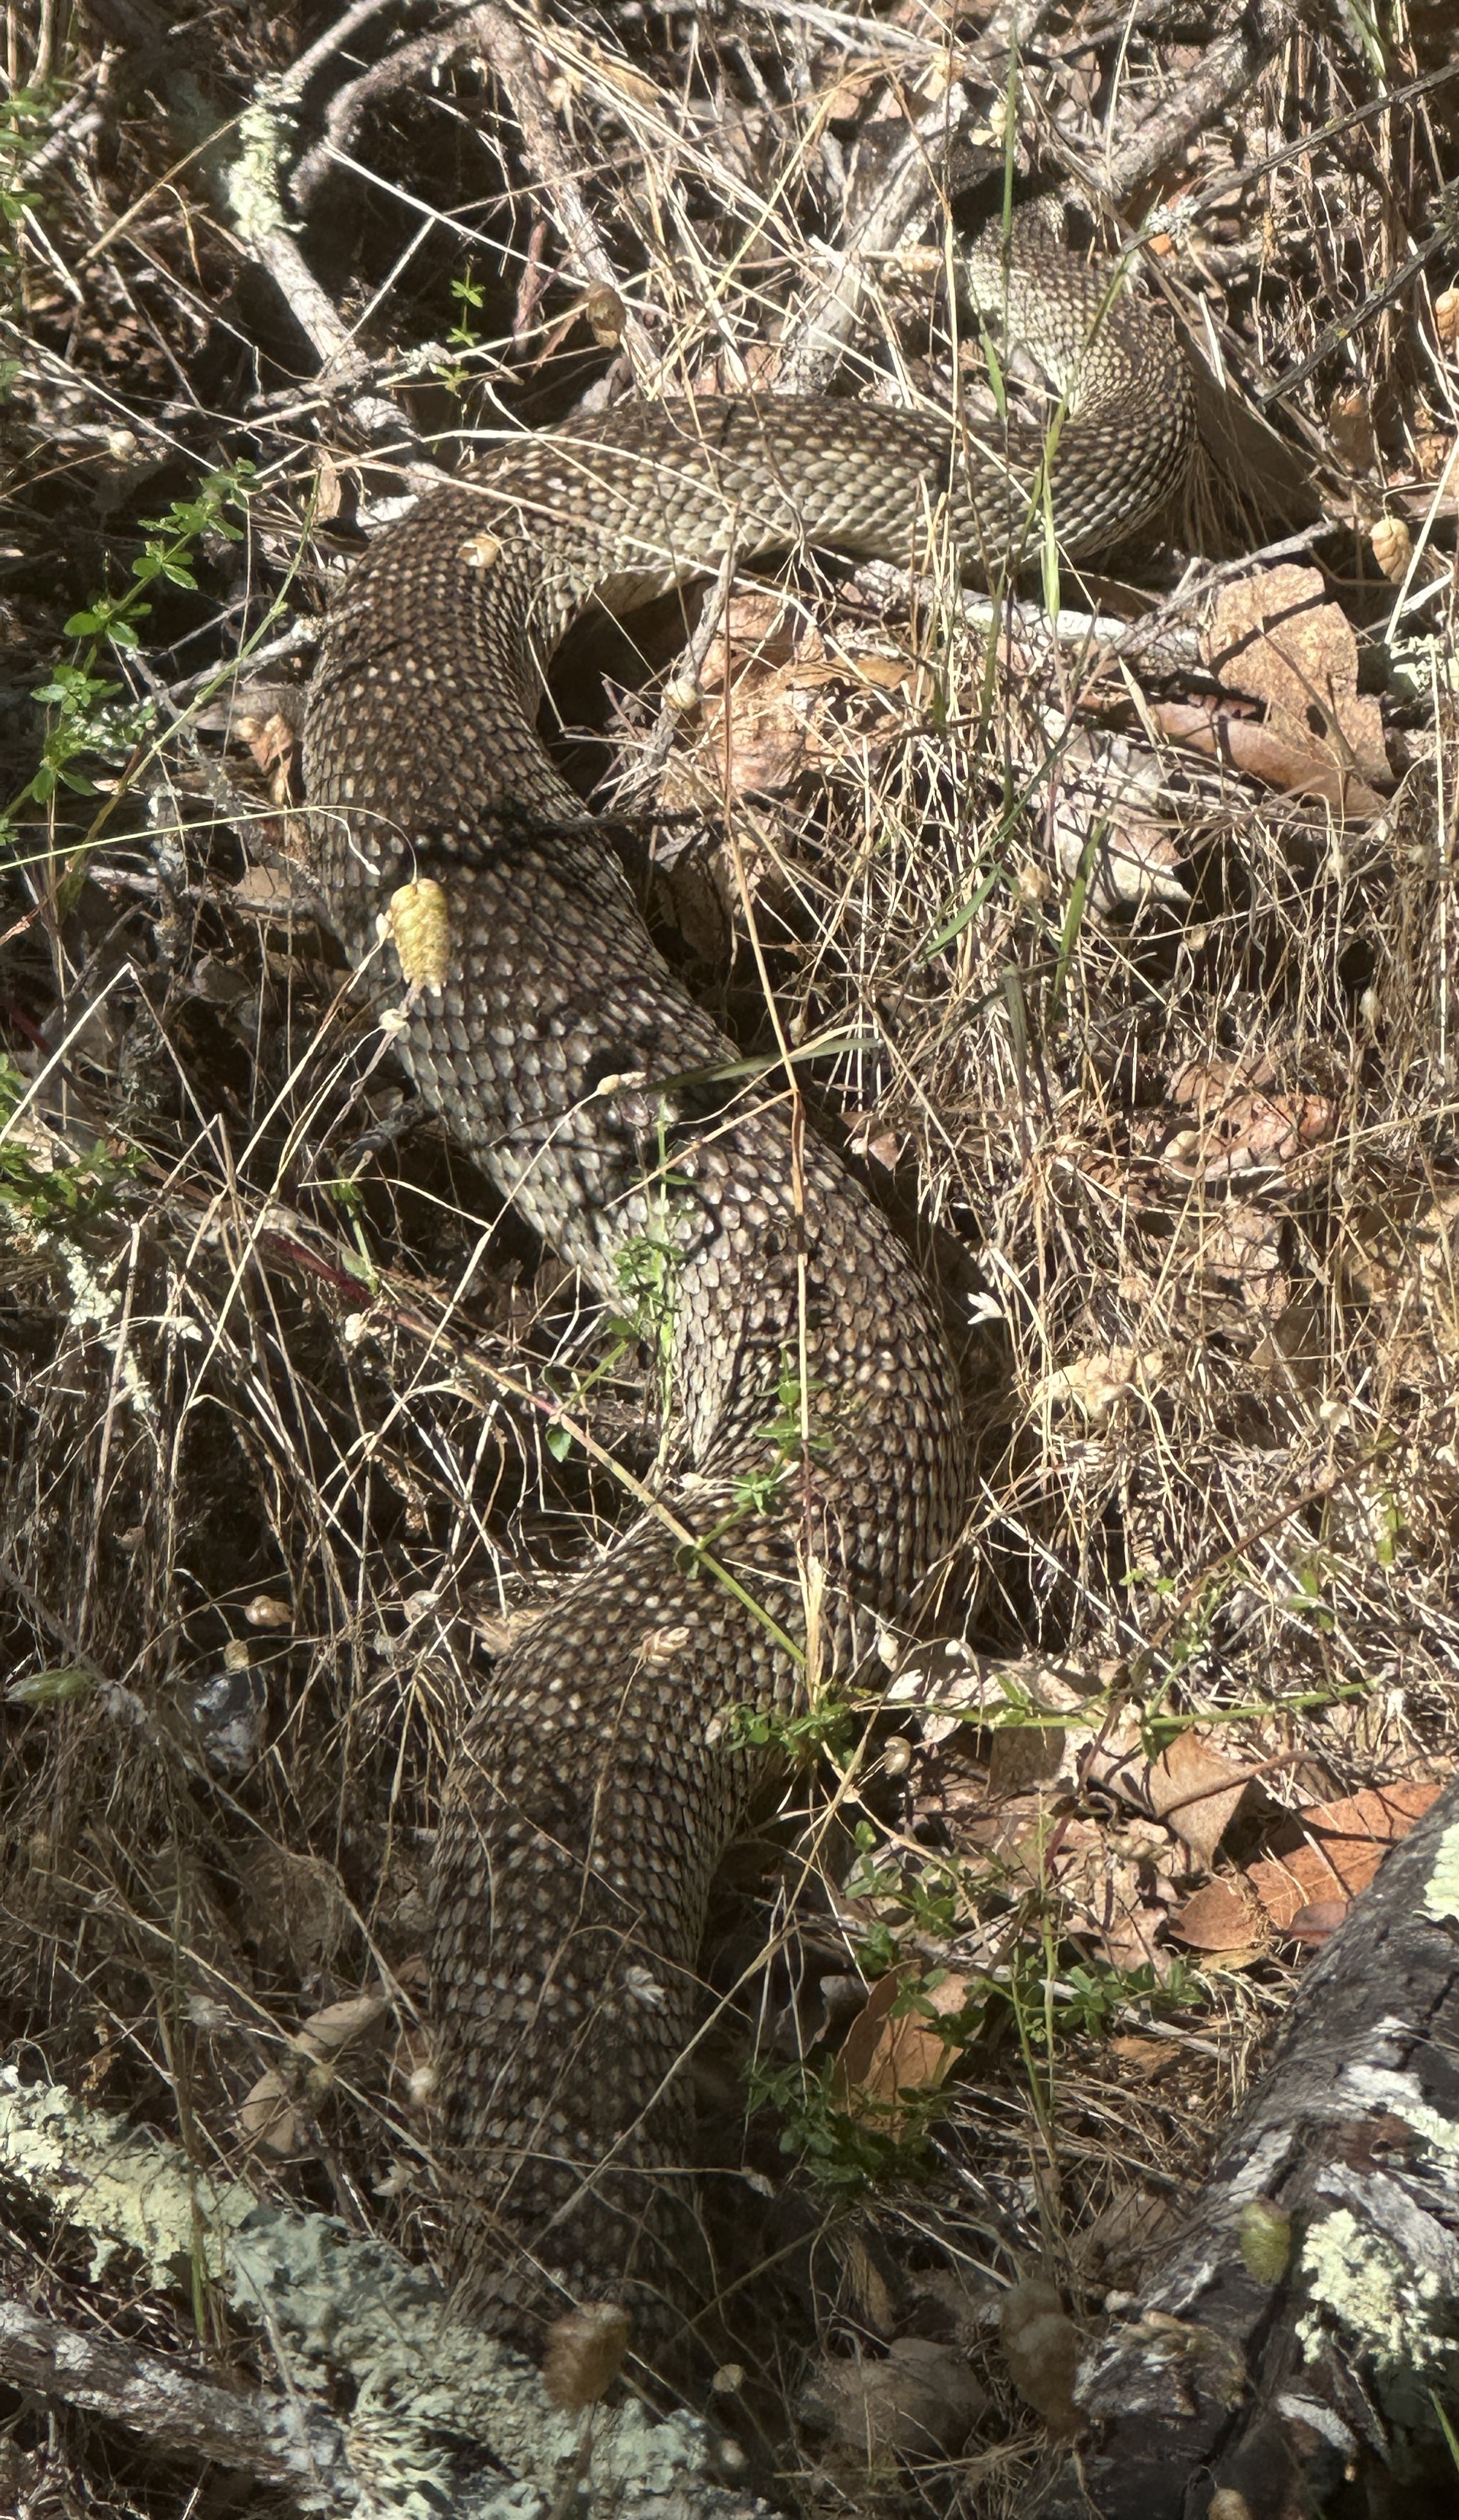
Snake Camo

Proactive Tips to Avoid a Bite

One study in California revealed that two-thirds of rattlesnake bites occur on the hands or arms, often affecting young men who were trying to handle or touch the snake.

To keep yourself safe, follow these trail rules:

  • Watch your step and grip: Always look exactly where you are placing your feet and hands.
  • Wear long pants and sturdy, closed-toe hiking shoes.
  • Stick to the trail: Avoid walking through tall grass, heavy underbrush or near rocks where snakes like to hide.
  • Never count on the rattle: A startled snake may strike without rattling first, and some snakes lose their rattles entirely.
  • Under the influence?  Many bites occur to folks who have been drinking.  Not only does the impulse control go down, but alcohol thins the blood and increases heart rate, causing venom to spread faster.

First Aid: What to Do If Bitten
If you are bitten, stay calm and act quickly. While rattlesnake venom can cause painful swelling, bruising, and tissue damage, modern antivenom is incredibly effective. Out of 39 million residents, California only sees about 300 reported rattlesnake bites per year.

Do:

  • Call 911 immediately and follow the dispatcher’s instructions.
  • Keep your heart rate low.  Increased exertion spreads venom faster through the body.
  • Remove restrictive items like rings, watches, or tight bands.
  • Keep the bite level with your heart.
  • Walk calmly toward help or a cell signal if you are far from assistance.  Moving toward help is better than waiting if emergency services don’t know where you are.

Do NOT:

  • Do not try to catch or kill the snake.
  • Do not apply a tourniquet or ice.
  • Do not cut the wound or try to suck the venom out.

Again, snake bites are extremely rare–let’s keep it that way!  And for much more about snakes, check out Snake Chat: A Conversation with Local Reptile Educator Galen Freed-Wilhem!

All the Rocks You Never See

I work on the trail, or hike it, most days. Even as I’m hiking I’m inspecting it. I know the rockiest places, I know where there are roots. I’m even familiar with individual stones. Call me obsessed, but in the best possible way. But yes, still obsessed.

By now I’m sure you know (if you’ve ever read this blog in recent years) that as the Trail Maintenance Chair I’ve been focused on “trail smoothing” or “tread renewal.” Many of our recent monthly volunteer workdays have been mostly focused on this (see this time-lapse video of rebuilding a section for a taste). There’s a reason for that. For many years we volunteer stewards (including me) did not believe in tackling what I now call “rock work.” That is, taking out or chipping down rocks in the trail. And it started to show — often dramatically so. Entire stretches of trail became difficult to navigate, even for the nimble.

Continue reading

Rock Patrol Ups Its Game

rock chiselAfter I became Maintenance Chair, I began considering new kinds of trail maintenance activities. Since Sonoma Overlook Trail is a particularly rocky trail, over the past year or so I pioneered what I dubbed “Rock Patrol“. As it was originally conceived, it consisted of hiking the trail with a shovel and a pry bar, levering out rocks and backfilling with soil to remove “trip rocks” and make a smoother tread.

Over time, I added an activity that I called “trail smoothing”, which I conceived of as a more systematic effort over a stretch of trail from 6-12 feet or more. In this activity, we would remove many rocks from the trail bed and fill with soil and gravel, packing it down to recreate a smooth tread. This was devised as an activity for our monthly group trail maintenance work days.

Now I’ve added another activity that I’m calling “rock reduction”. To do this, we’ve purchased a cordless rock chisel/hammer/drill (pictured; click the photo to see a video of it in action). As I say in the video, it is a complete game-changer. I really don’t think there is a rock on the trail that we can’t now either completely remove or reduce to trail level or below.

Given that fact, I’m now open for any trail hiker or runner’s nominations of rocks to remove or reduce. Take a photo of your most hated rock and/or ridge of bedrock that impinges on the trail and send it to me at roytennant@gmail.com along with a description of where to find it on the trail. Just do your best; I’m pretty sure I will recognize it. Having nominated it, I will let you know when it has been removed or reduced.

Check out the video. It’s less than 2 1/2 minutes long and I think it does a great job of illustrating how we can now take down even some of the hardest rocks on the trail (many are much softer than the one in the video, which I had originally attempted to take out using a large, heavy, iron pry bar).

Rock reduction is now officially part of our arsenal.

Rock Patrol to the Rescue

IMG-1995

The massive rock we had to remove.

The Sonoma Overlook Trail is coming up on its 20-year anniversary. In twenty years of heavy use, the trail bed can become quite eroded, thereby exposing rocks that can become tripping hazards. Recently the trail stewards in charge of trail maintenance have begun a concerted effort to transform particularly rocky sections of the trail into smooth paths by removing rocks and filling the resulting holes with packed aggregate and soil. We call this activity “Rock Patrol.”

The last two standing monthly work days were dedicated to performing this work on two sections of trail under the Upper Meadow. Today, the section we worked on included a rather massive boulder (see picture) that we dug out and rolled off the trail. Now, instead of that tripping hazard there is smooth trail.

IMG-1999

The final result (note the big rock on the left that we removed).

We recently set a goal to create 18-24″ of smooth path for the entire length of the trail, realizing that there may be some sections where this is not possible. Of course those of you who are familiar with the trail will understand the enormity of this undertaking, and therefore will likely also understand that this work will take years to accomplish. We won’t just do this work in group work days. Rock Patrol can also be a solitary activity, as sometimes all that is required to make a section of the trail safe is to remove a solitary “trip rock” from the middle of the trail. That can be accomplished by a single volunteer.

Tick, tick, tick….

The recent refreshing rain likely to have rejuvenated more than just our local waterways:

“…for someone hiking, ticks will have gone from practically zero a couple of weeks ago to being out…and their numbers will probably be increasing through January.”
https://www.pressdemocrat.com/article/news/rain-is-about-to-set-off-the-tick-time-bomb-in-california/

A few tips from the American Hiking Society:

  • Determine risk: Spring and early summer are high-risk for ticks because ticks are in an earlier stage of their development, called “nymphs.” Nymphs often carry heavier loads of disease-causing pathogens, and are smaller and harder to spot. Tall grass and brush are higher-risk, too, because ticks can easily climb on to hikers.
  • Wear long and wear light! Wear long-sleeve shirts and long pants of a light color. Lighter colors seem to attract fewer ticks and make the ones that do end up on you easier to spot. Lightweight nylon or polyester garments are almost as cool as shorts and protect from the sun as a bonus!
  • Seal the cracks. Tuck your shirt into your pants and tuck your pants into your socks. Gaiters can add an additional level of protection and keep small rocks and dirt out of your shoes too.
  • Repel invaders! Consider treating your clothing with a persistent repellent chemical called permethrin. This substance, applied to clothing, repels ticks and biting insects for up to 2 weeks. Some clothing comes already coated with this deterrent. Apply an additional repellent to all exposed skin.
  • Wash your hiking clothes. As soon as you get off the trail, wash your hiking clothes and dry them in a hot dryer for an hour. The heat will kill any ticks.
  • Tick check. Showering within two hours of leaving the trail will help wash off any ticks which haven’t latched on. Using a hand-held or full length mirror, take this time to check yourself for ticks, especially checking armpits, hair, ears and behind the ears, belly button, behind the knees, and groin. Be sure to also thoroughly check your children and pets.
  • Remove any ticks. If you do happen to find a tick on yourself, do not use the old trick of poking the tick with a hot match head until it comes out. Do use tweezers and grab the tick as close to the skin as possible and slowly pull it out. If you can’t grab the head in the first go, make sure to pull it out before washing the bite with a disinfectant. View the CDC’s easy-to-follow tick removal instructions and pictures.
  • Stay vigilant. If you develop a fever, rash, muscle and/or joint aches, flu-like symptoms or become ill, be sure to mention to your doctor possible tick exposure. Lyme disease is very serious and can cause permanent damage in bones and the nervous system. Tick bites that develop a bulls-eye ring are infected and should be treated immediately.

Read more….

If you find that you have been bitten by a tick, save the insect after removal and submit it to Sonoma County Department of Public Health for Lyme testing:
https://sonomacounty.ca.gov/Health/Public-Health/Laboratory/Lyme-Tick-Test/